Build on Success
Use structures and formats that have already proven their effectiveness
Save Time
Create new emails and automations faster by not starting from scratch
Consistent Results
Maintain the elements that drive engagement while refreshing the content
Getting Started with Remixing
1
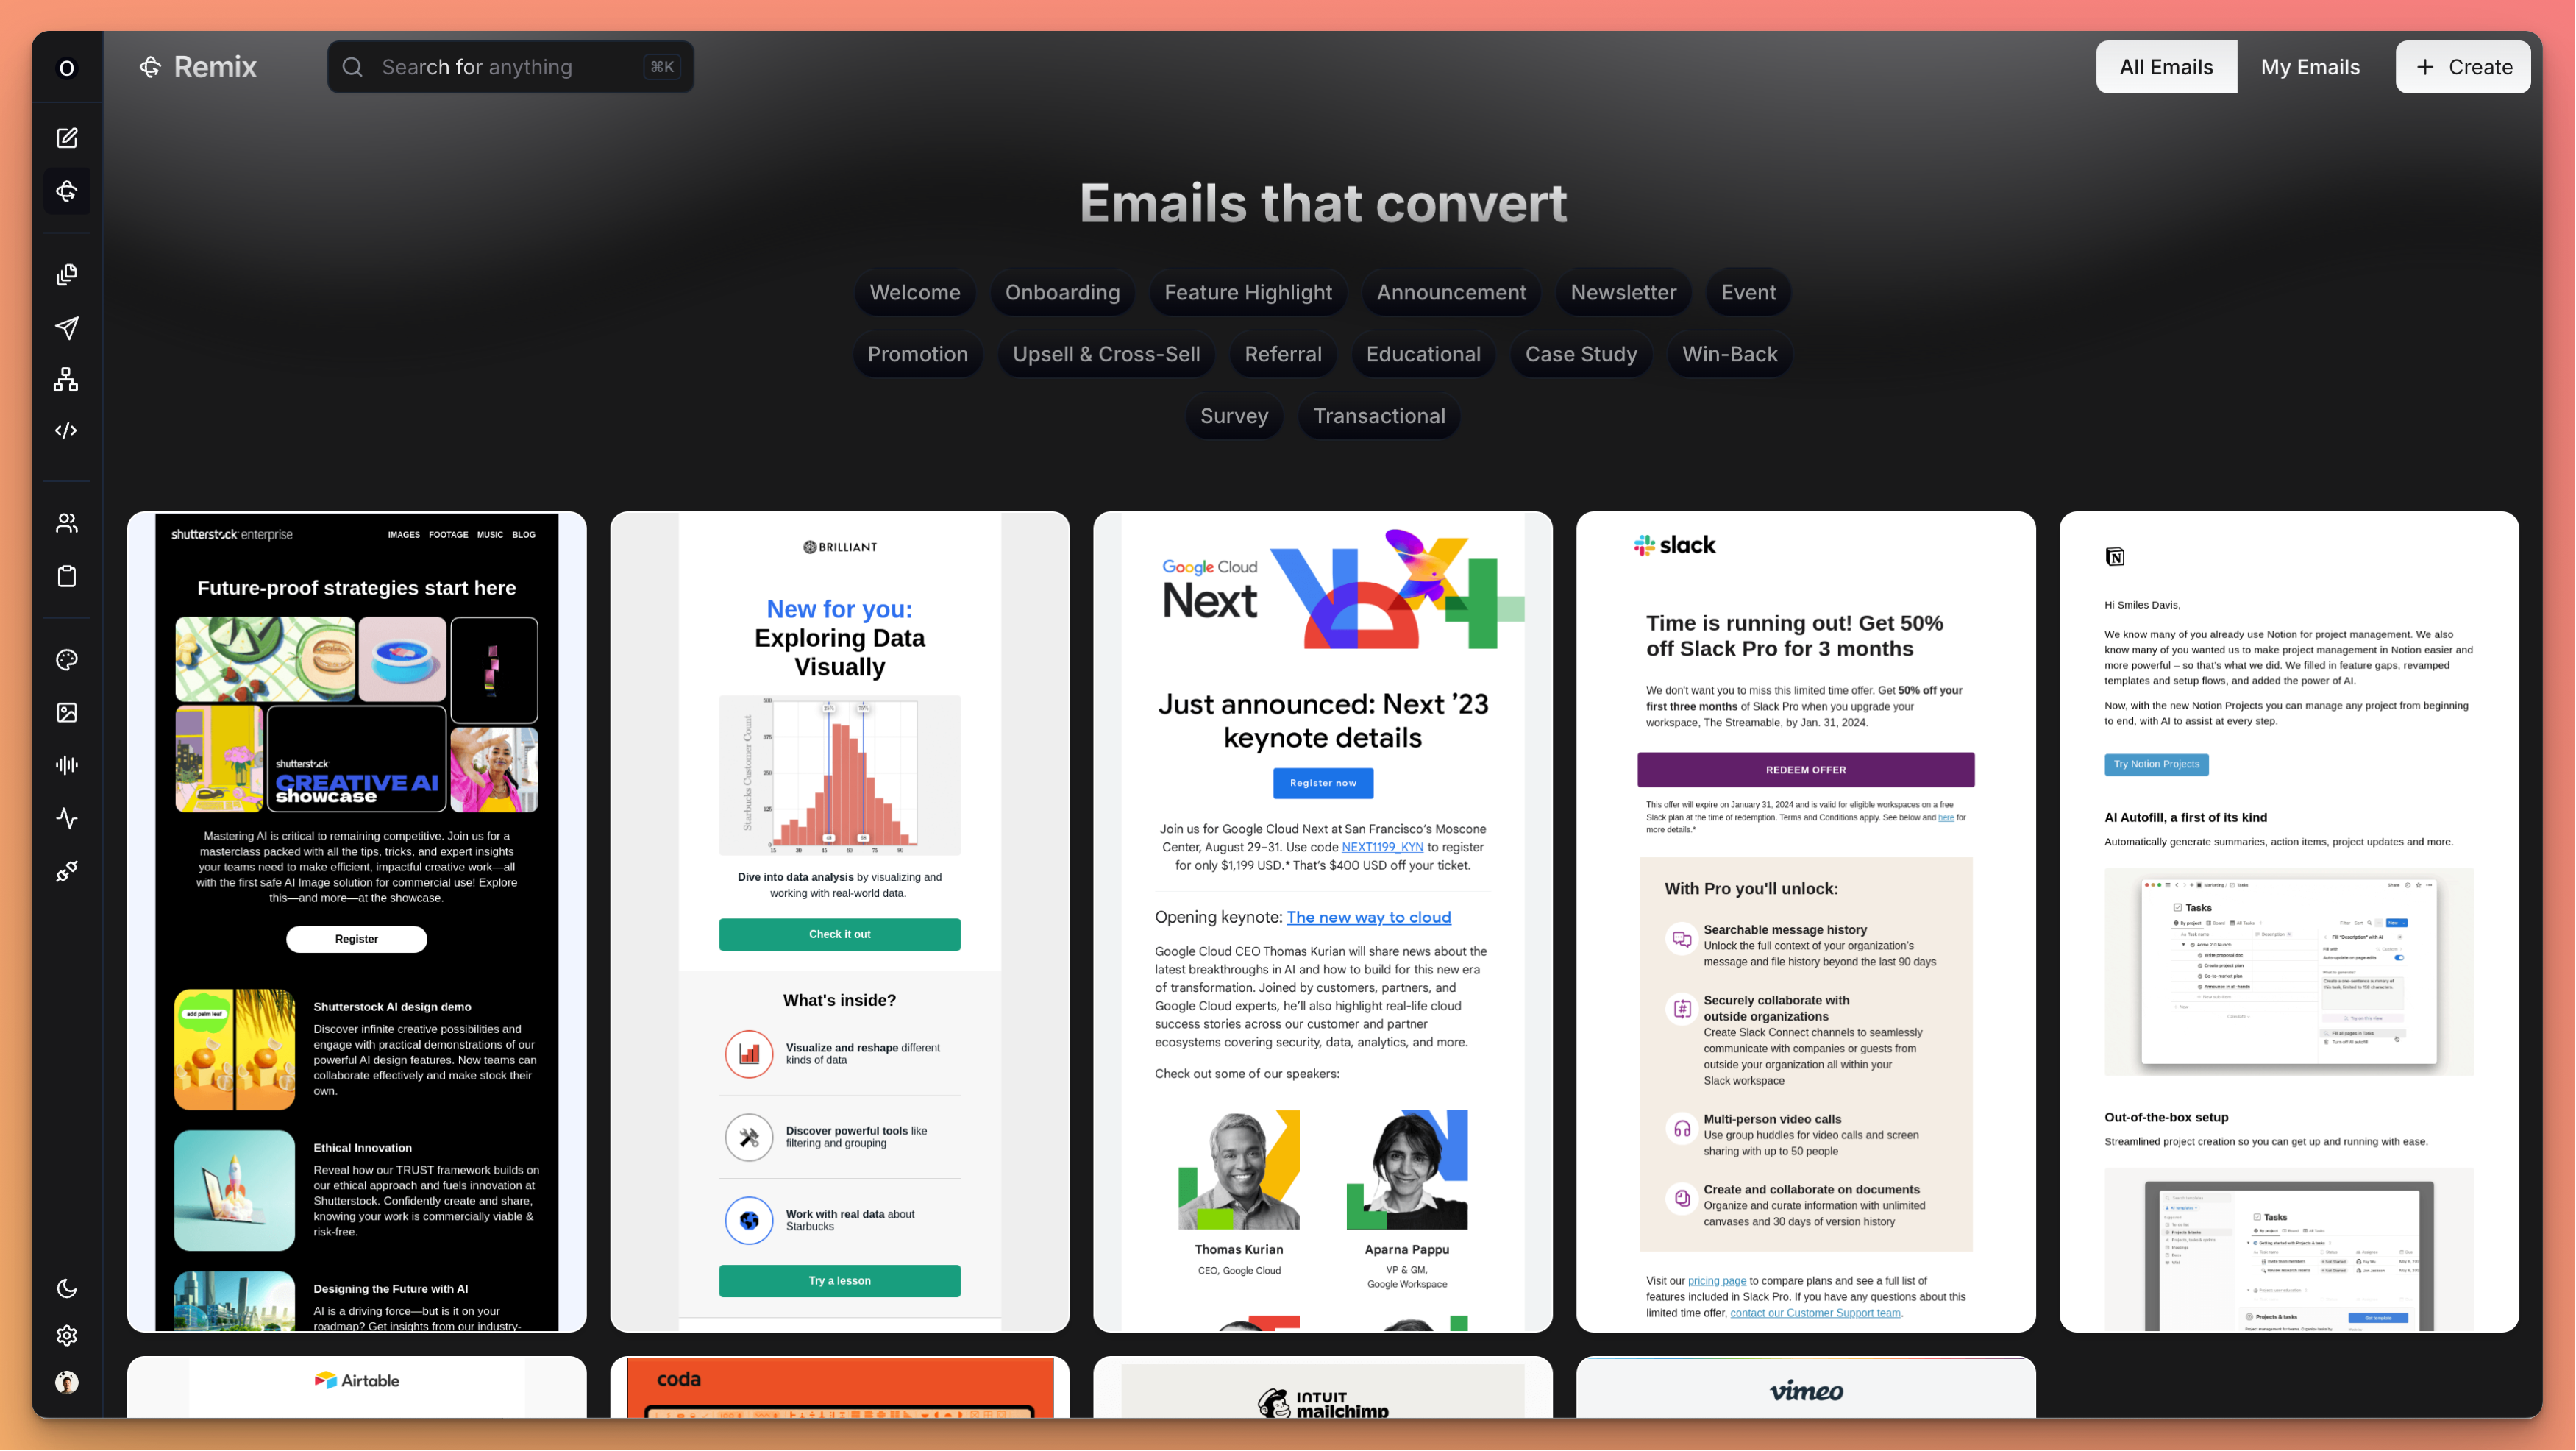
Browse and filter emails
From the Remix page, you can filter emails in two ways: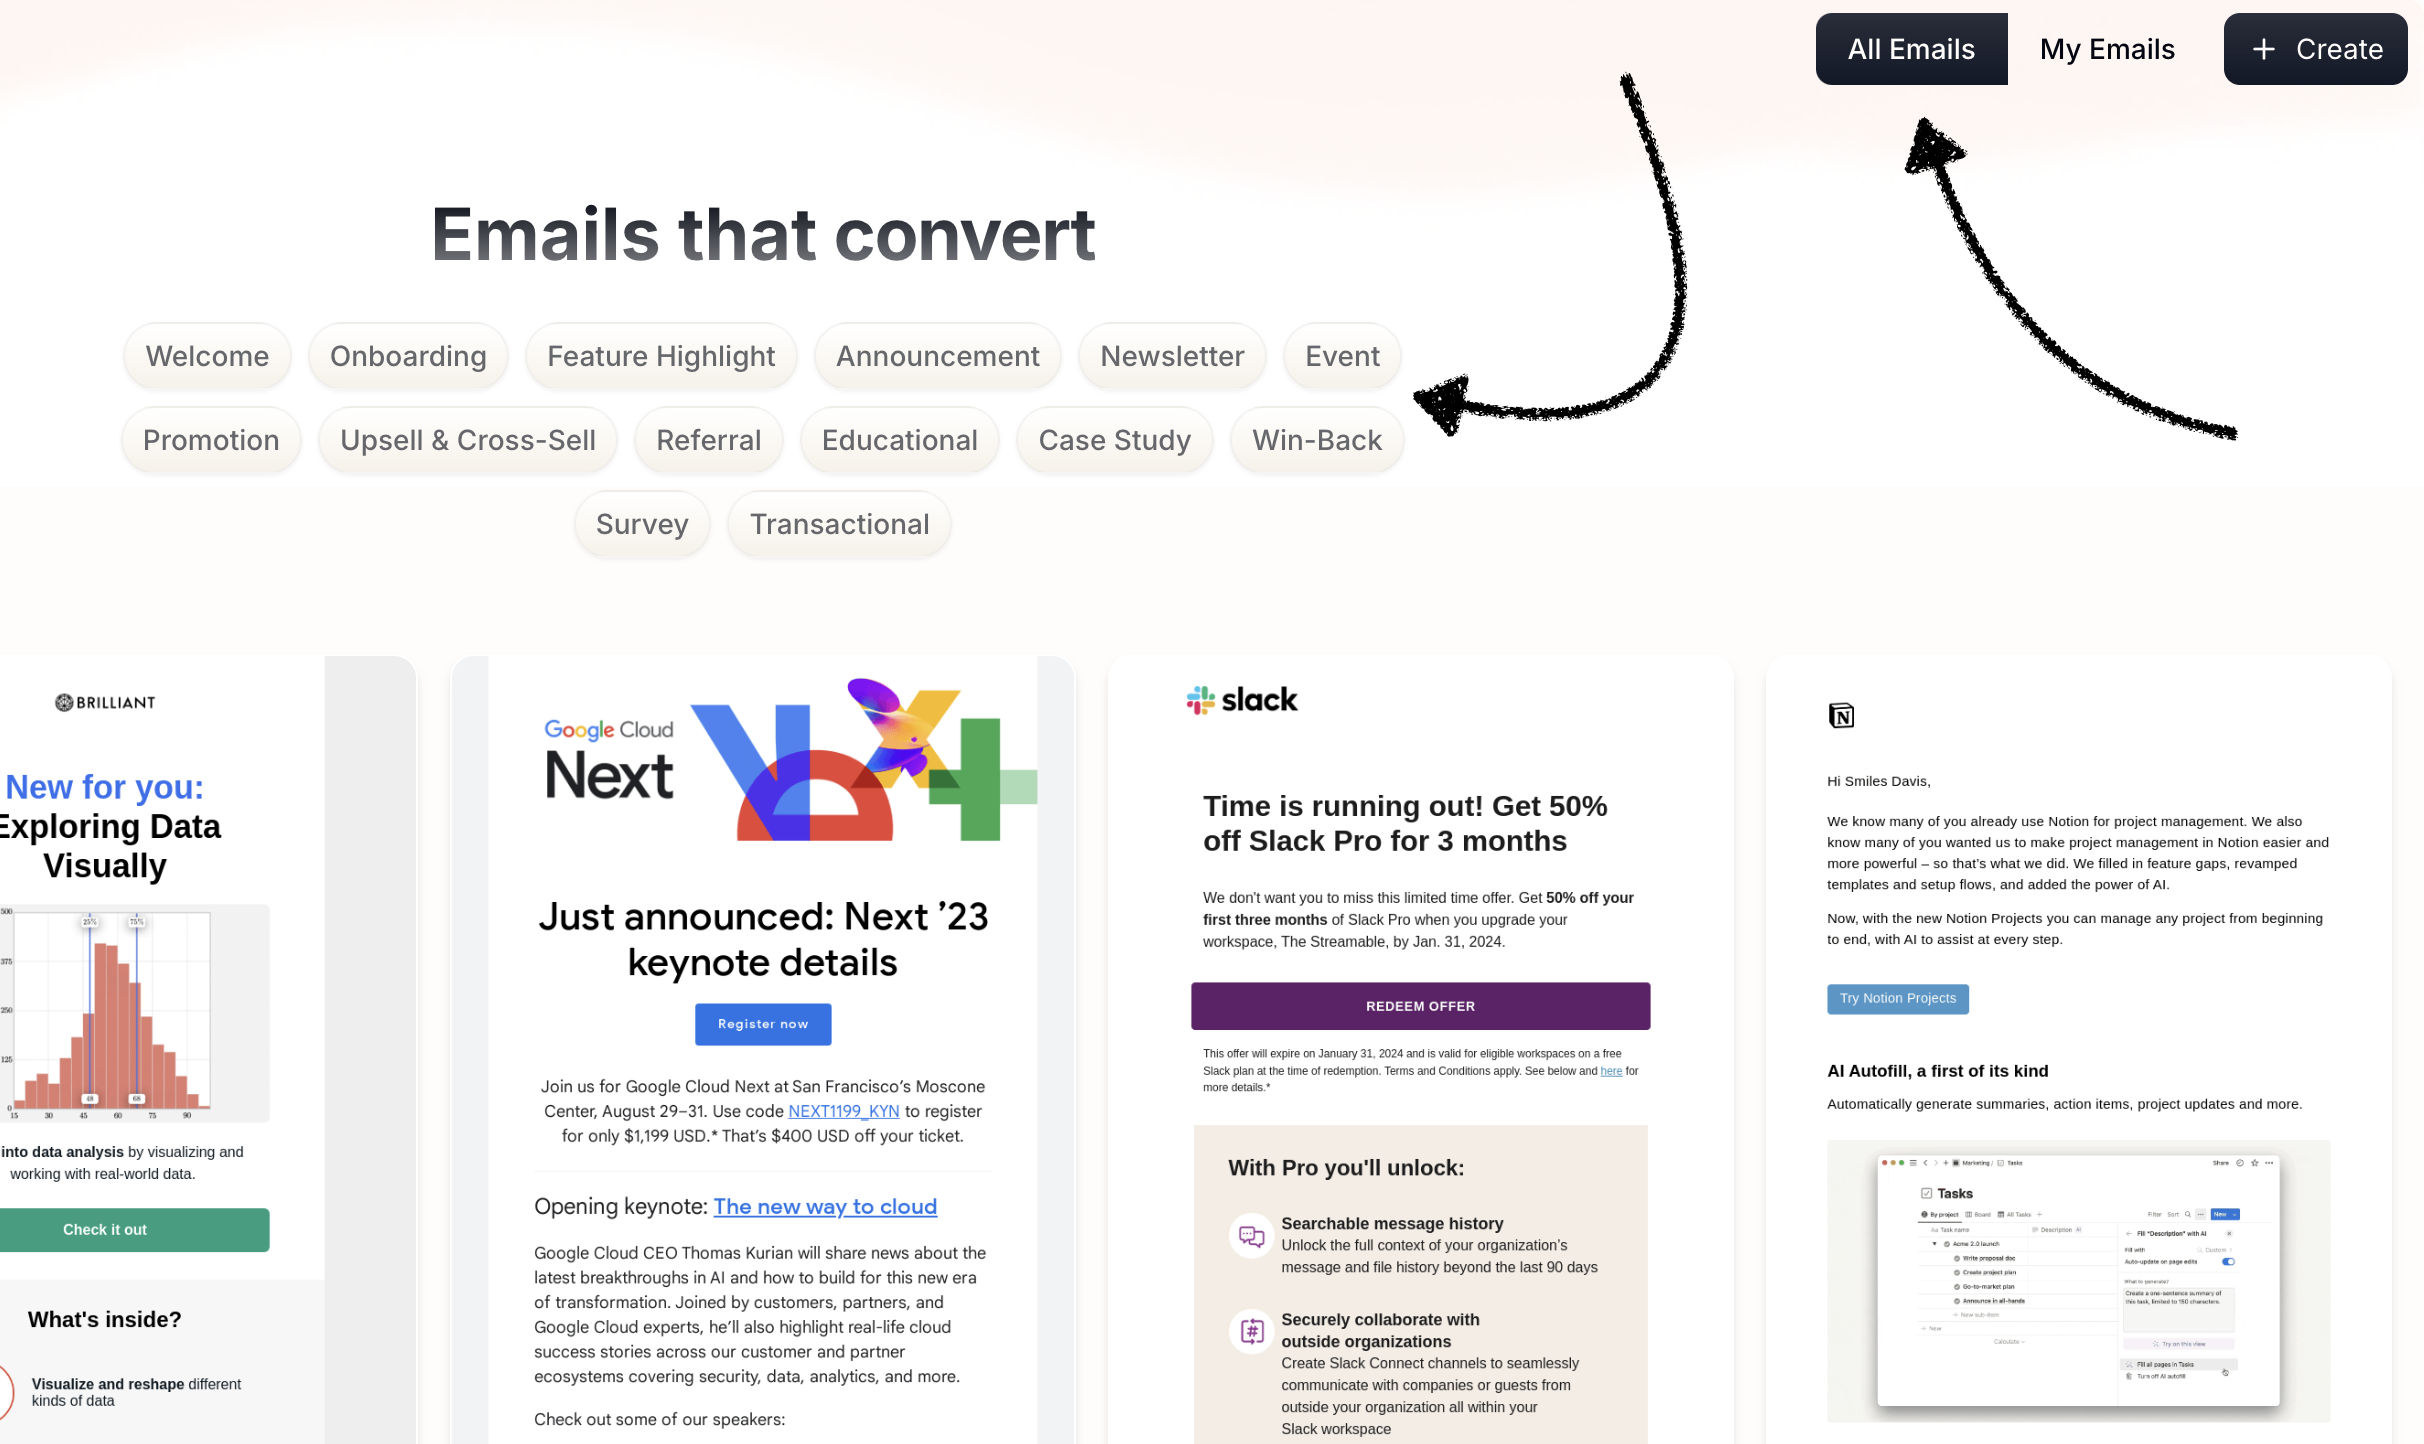
- Toggle between all emails or just your emails using the switch in the top bar
- Filter by email type using the tags representing different email categories
Email types you can filter by
Email types you can filter by
These categories represent the most common and effective email types:
- Welcome: Introduce your brand and set expectations
- Onboarding: Guide customers to their first success and build trust
- Feature Highlight: Explain how a feature works and why it’s useful
- Announcement: Share big news like launches, initiatives, or milestones
- Newsletter: Keep stakeholders in the loop on important updates or news
- Event: Invite customers to join webinars or live events
- Promotion: Create urgency with exclusive discounts or limited-time offers
- Upsell & Cross-Sell: Recommend complementary products or upgrades
- Referral: Reward customers for bringing in new customers
- Educational: Share tips, tutorials, or best practices to help customers succeed
- Case Study: Show how others have achieved success by using your product
- Win-Back: Reactivate dormant customers
- Survey: Ask for feedback to collect customer insights
- Transactional: Notify customers of critical account or purchase information
2
Select an email to remix
Browse through the filtered emails and automations, click on the one you’d like to remix.
- Read the content summary
- Preview the email design
3
Describe your remix
After selecting an email or automation, provide a remix prompt.
- Campaign Remix Examples
- Automation Remix Examples
- Transactional Remix Examples
“Update our product launch email for our new analytics dashboard instead of our CRM tool, keeping the same structure and tone”
“Transform our Black Friday promotion into a Summer Sale announcement with the same layout and call-to-action style”
“Adapt our webinar invitation to promote our upcoming conference instead, maintaining the same benefits-focused approach”
“Refresh our monthly newsletter format with new sections but keep the successful intro and conclusion style”
“Convert this customer success story email into a case study about a different client in the healthcare industry”
4
Select your audience
Choose which audience should receive your remixed email. This helps Brew tailor the content to your selected segment.
5
Choose voice
Your default voice will be pre-selected, but you can change it for each remix.Voices ensure that emails are consistent & on-brand.
6
Select image style
Choose the image style that sets the visual aesthetic for any AI-generated images.
7
Generate your remixed content
Click the
Submit button to generate your remixed content.What happens next depends on what you’re remixing:- For Campaigns: You’ll be taken to the email editor to review and refine
- For Automations: You’ll see the automation builder with your email sequence
- For Transactional: You’ll set up event triggers and email content
Need Help?
Our team is ready to support you at every step of your journey with Brew. Choose the option that works best for you:- Self-Service Tools
- Talk to Our Team
Search Documentation
Type in the “Ask any question” search bar at the top left to instantly find relevant documentation pages.
AI Assistant Chat
Click the sparkle ✨ icon next to the “Ask any question” search bar in the top left to chat with our AI assistant that’s been trained on our entire documentation.
ChatGPT/Claude Integration
Click “Open in ChatGPT” at the top right of any page to analyze documentation with ChatGPT or Claude for deeper insights.