Coming Soon — Experiments is currently in closed beta with a small group of users. Please reach out if you’d like access.
What is Experiments in Brew?
Experiments (also known as A/B testing or split testing) in Brew allows you to test different versions of your emails within automations to see which performs better. You can test various elements like:- Subject lines - Test different approaches to see what resonates with your audience
- Email content - Compare different messaging, tone, or value propositions
- Design elements - Compare layouts, images, or visual styles
- Call-to-action buttons - Test different CTA text, colors, or placement
- Many more elements - Really anything you can edit in an email, you can test…
Creating an Experiment
1
Create Your Experiment
- With AI
- Manually
Simply state in the left-side chat that you’d like to create an experiment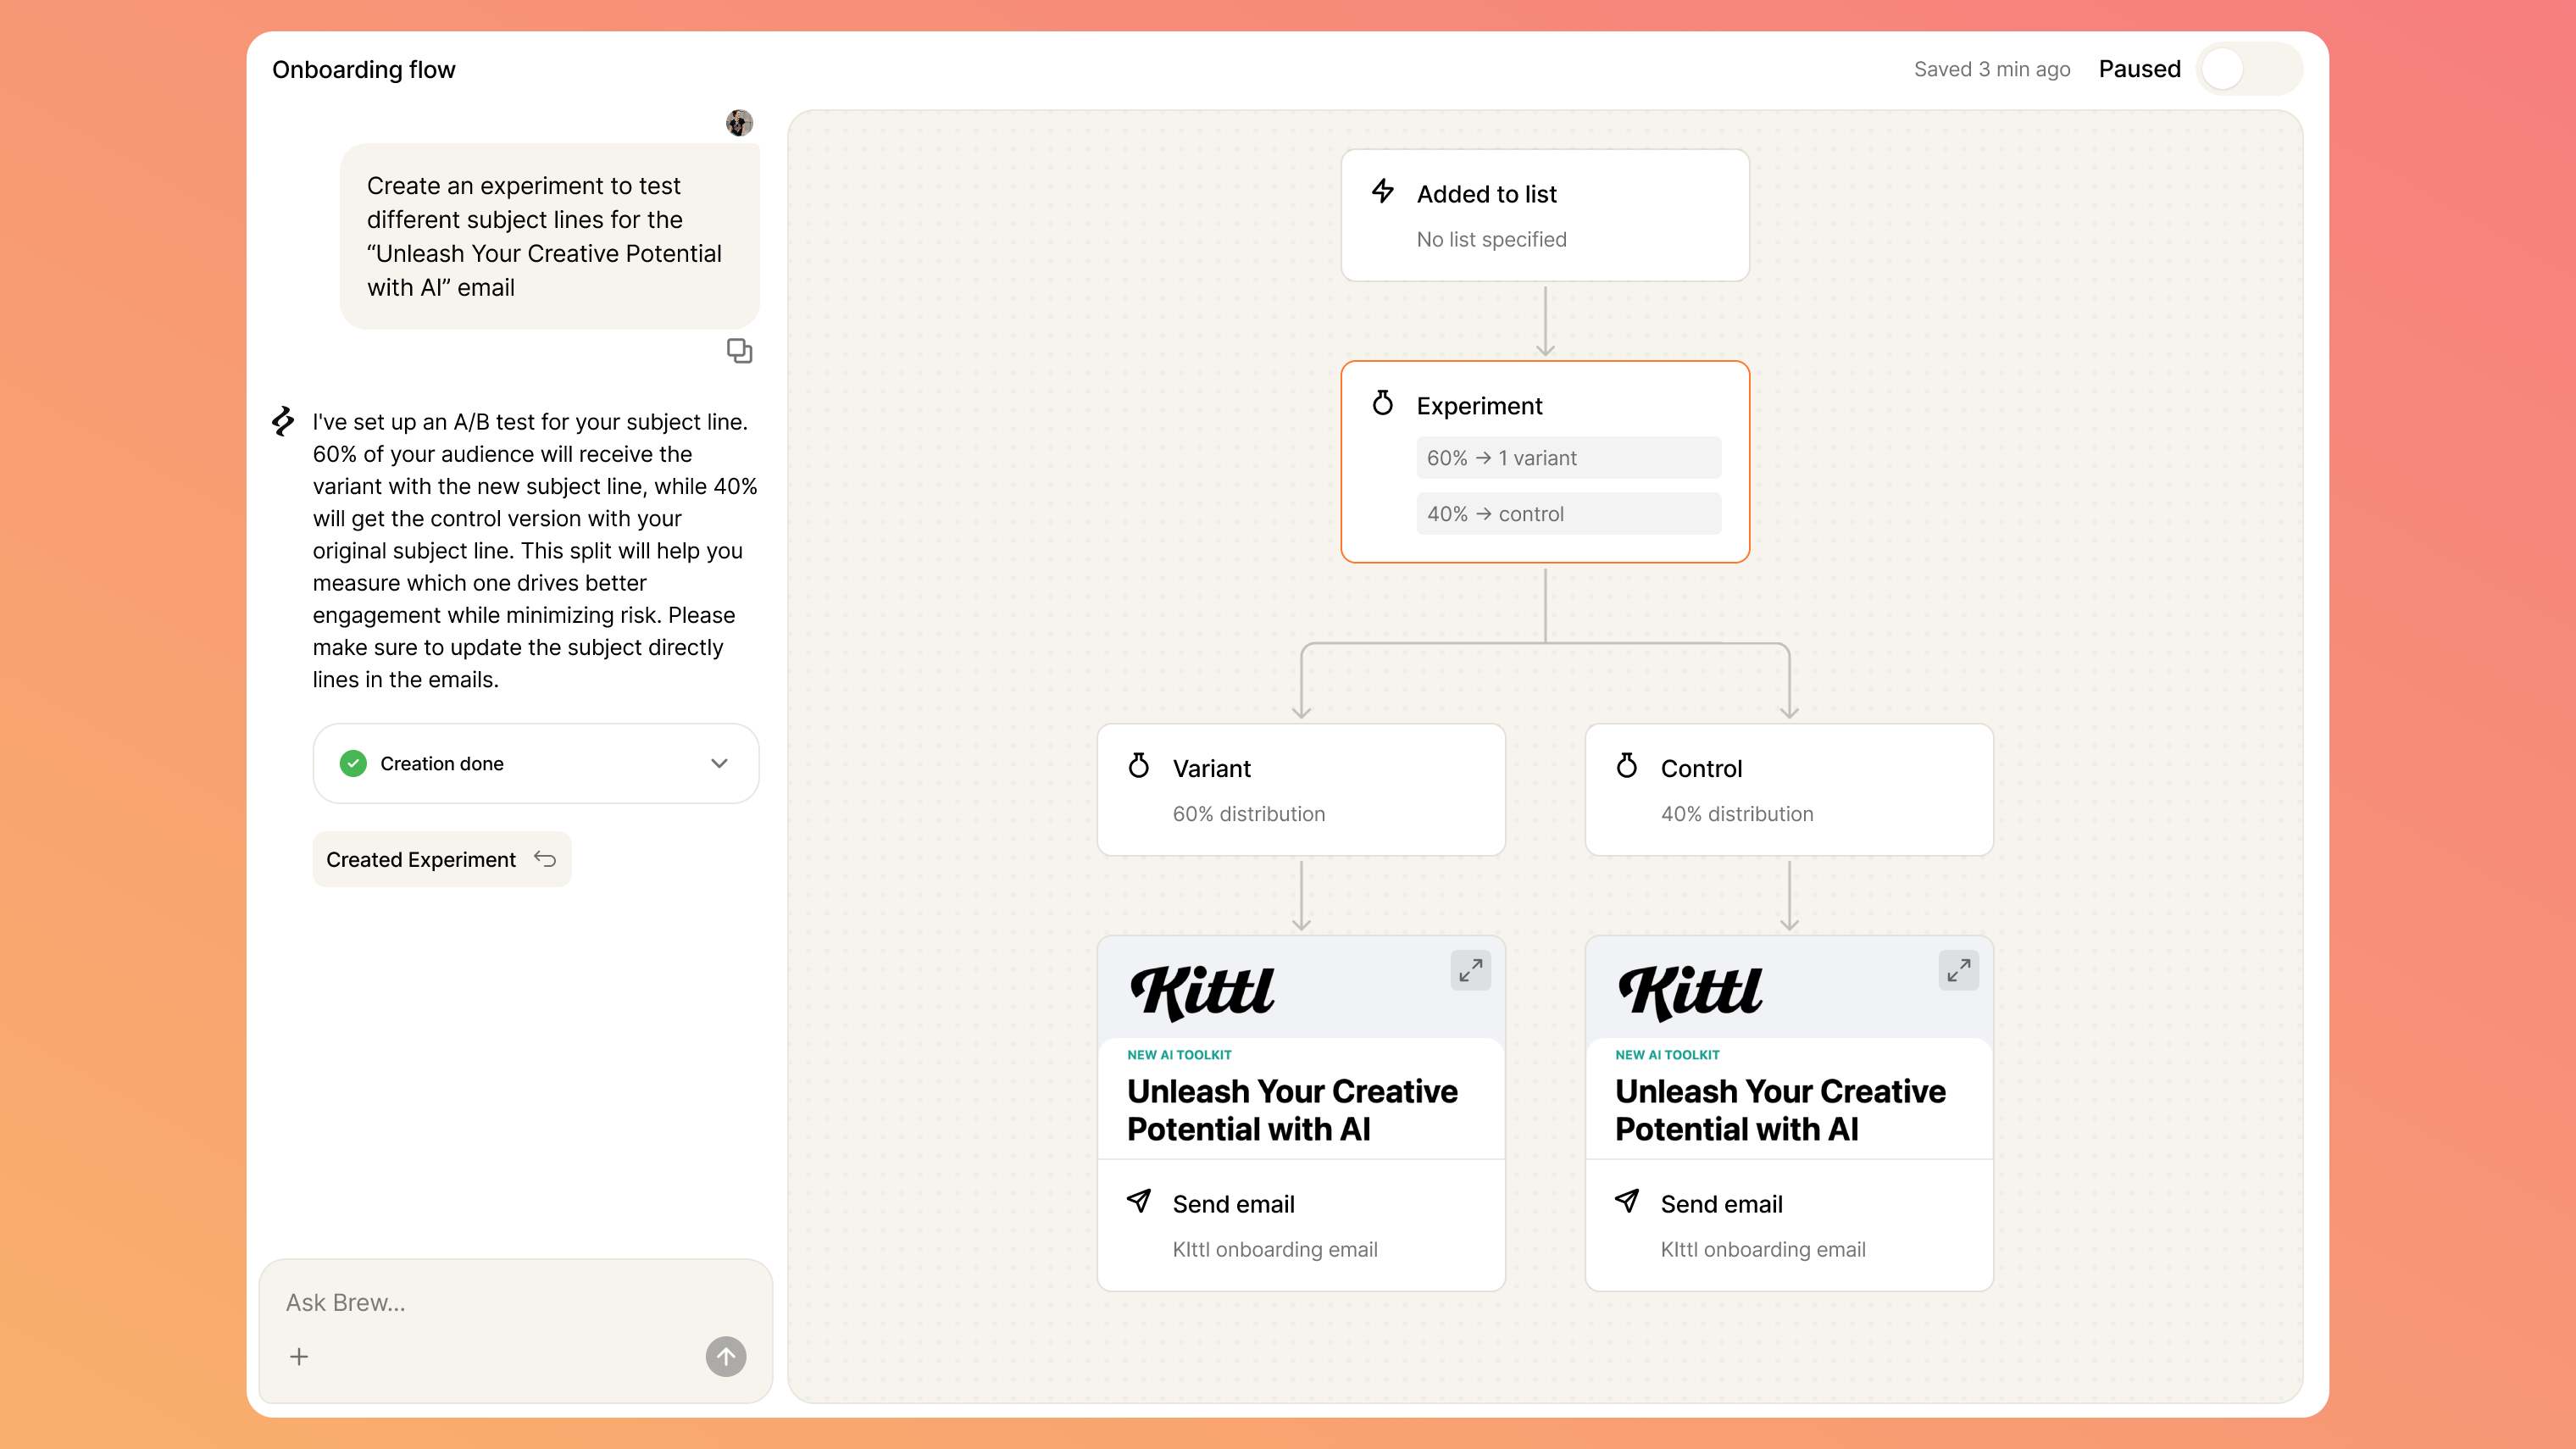
Create an experiment to test different subject lines for the “Unleash Your Creative Potential with AI” email
2
Configure Your Audience Split
Set your experiment’s audience split by adjusting the percentage slider in the Experiment node. This determines how many contacts will receive your test variants versus your control.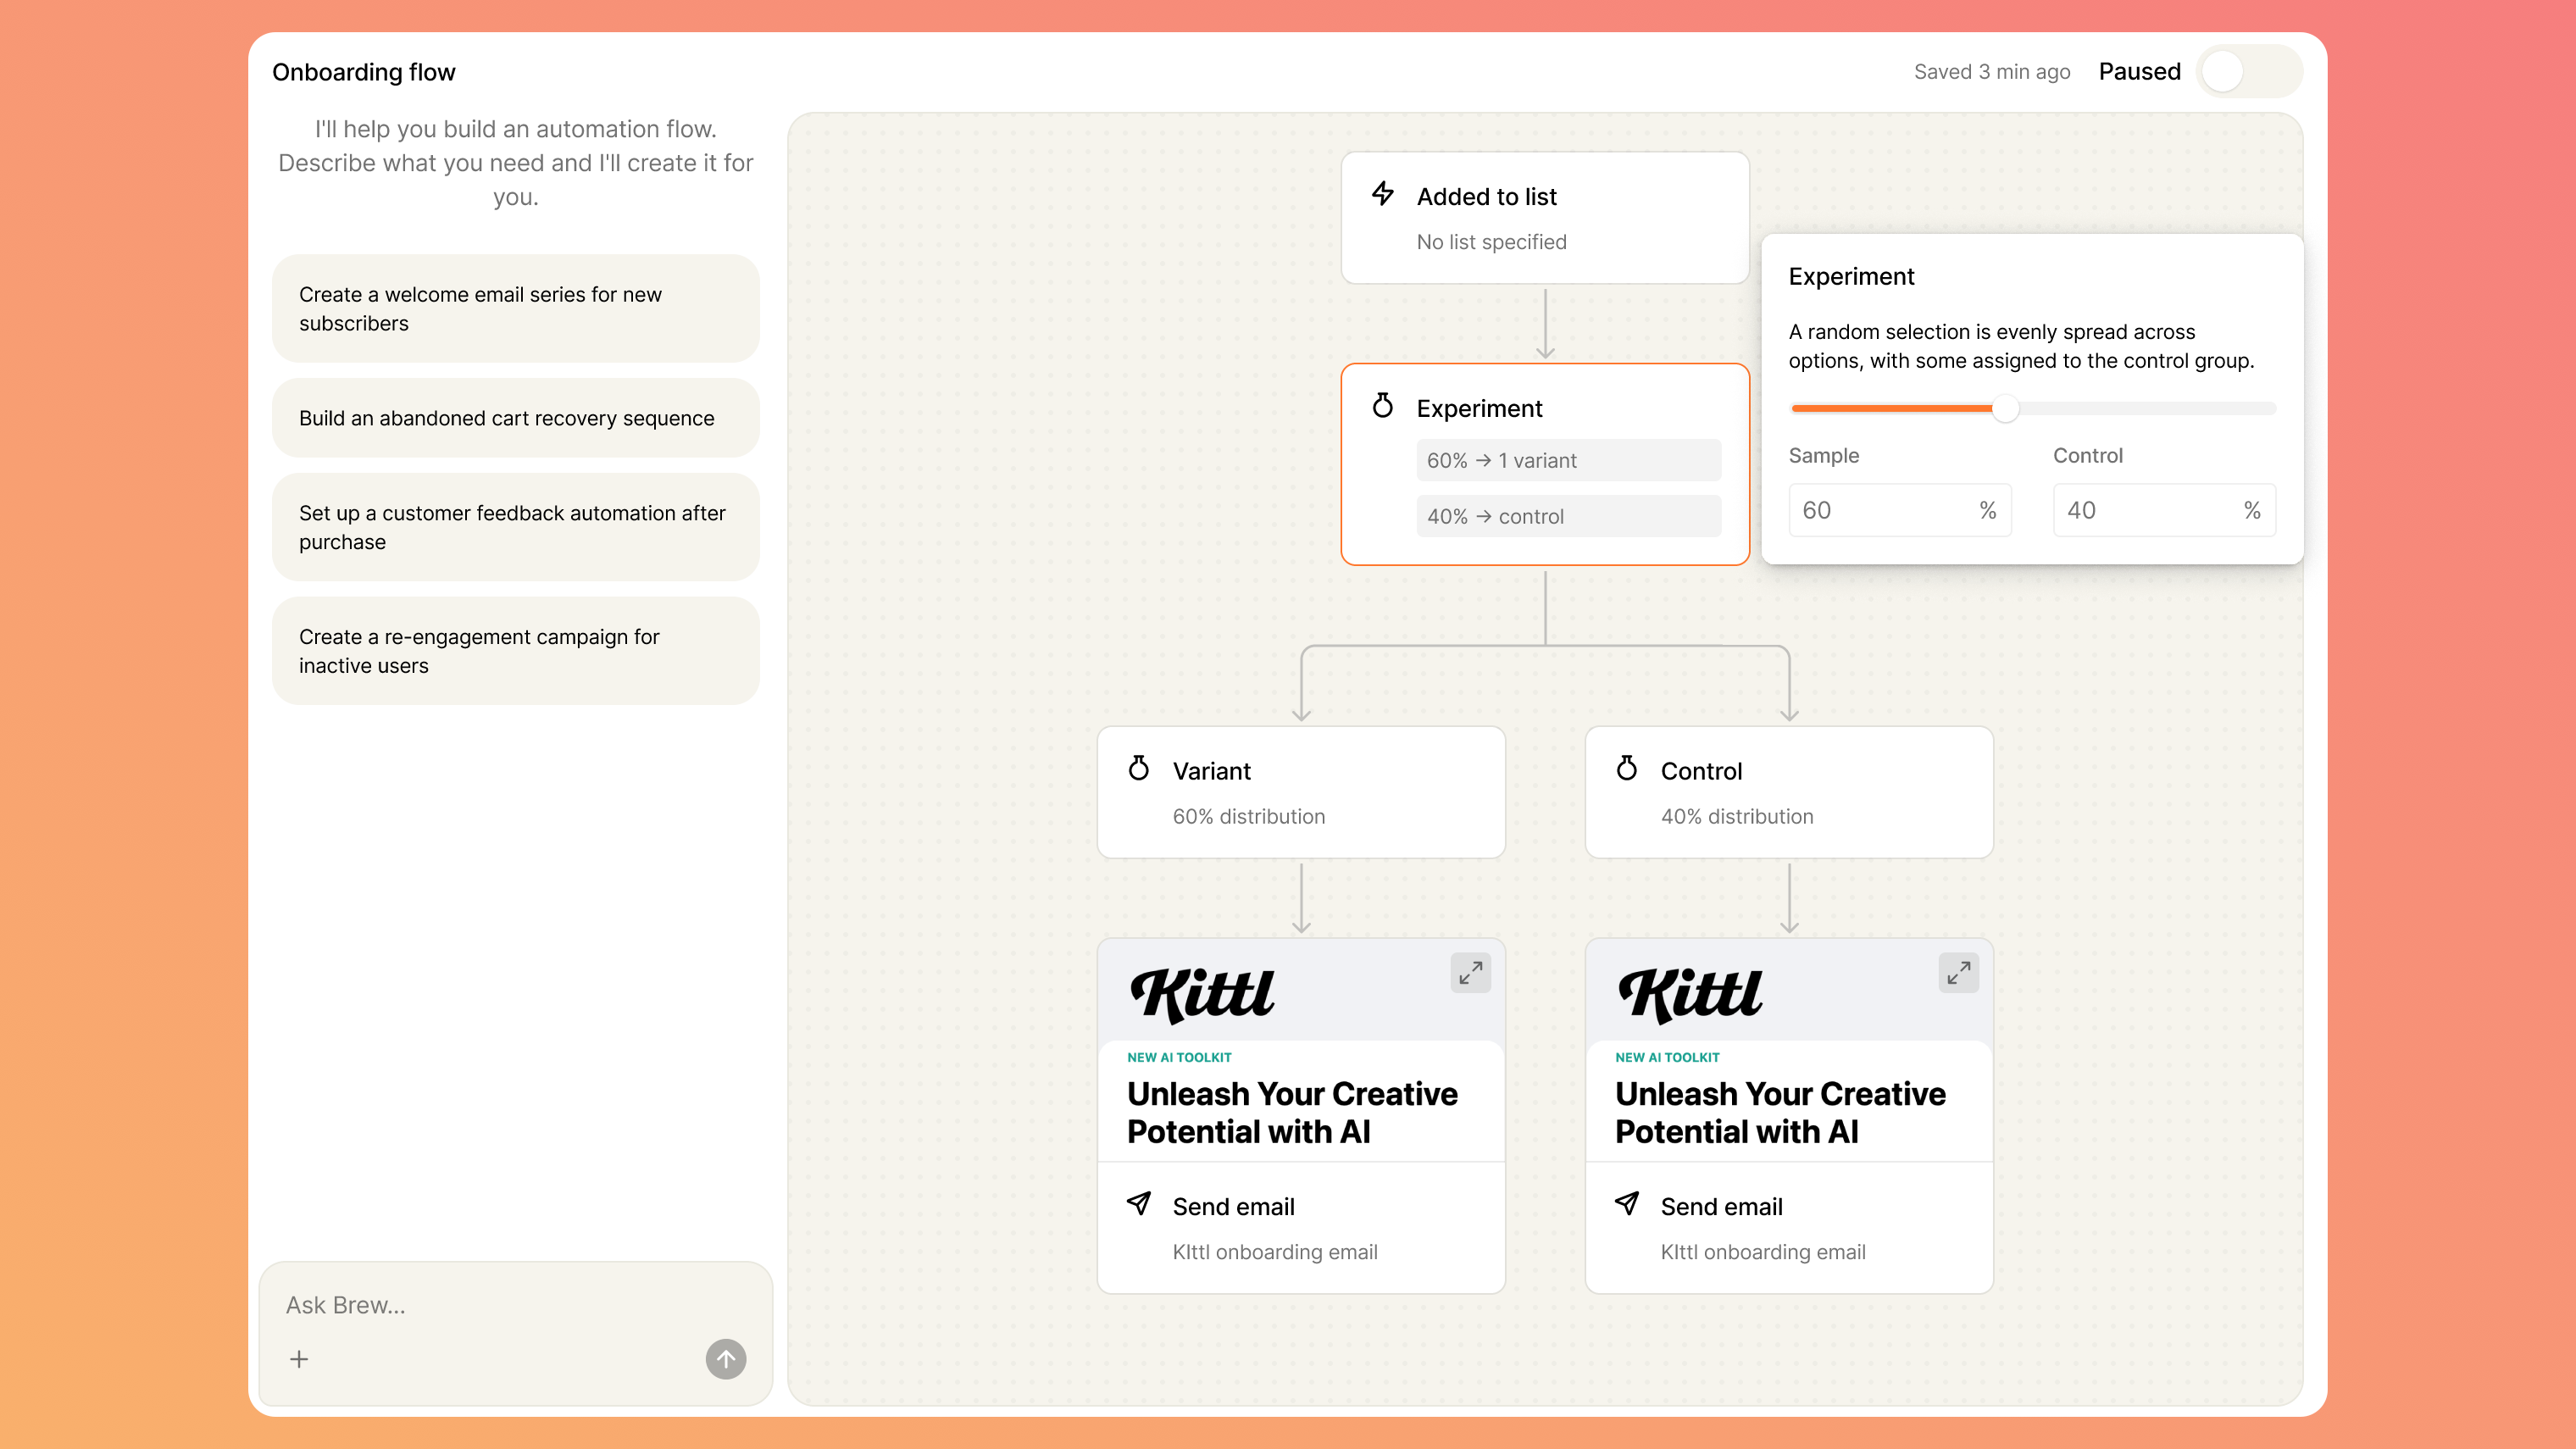
Understanding Experiment BranchesExperiments consist of two types of branches: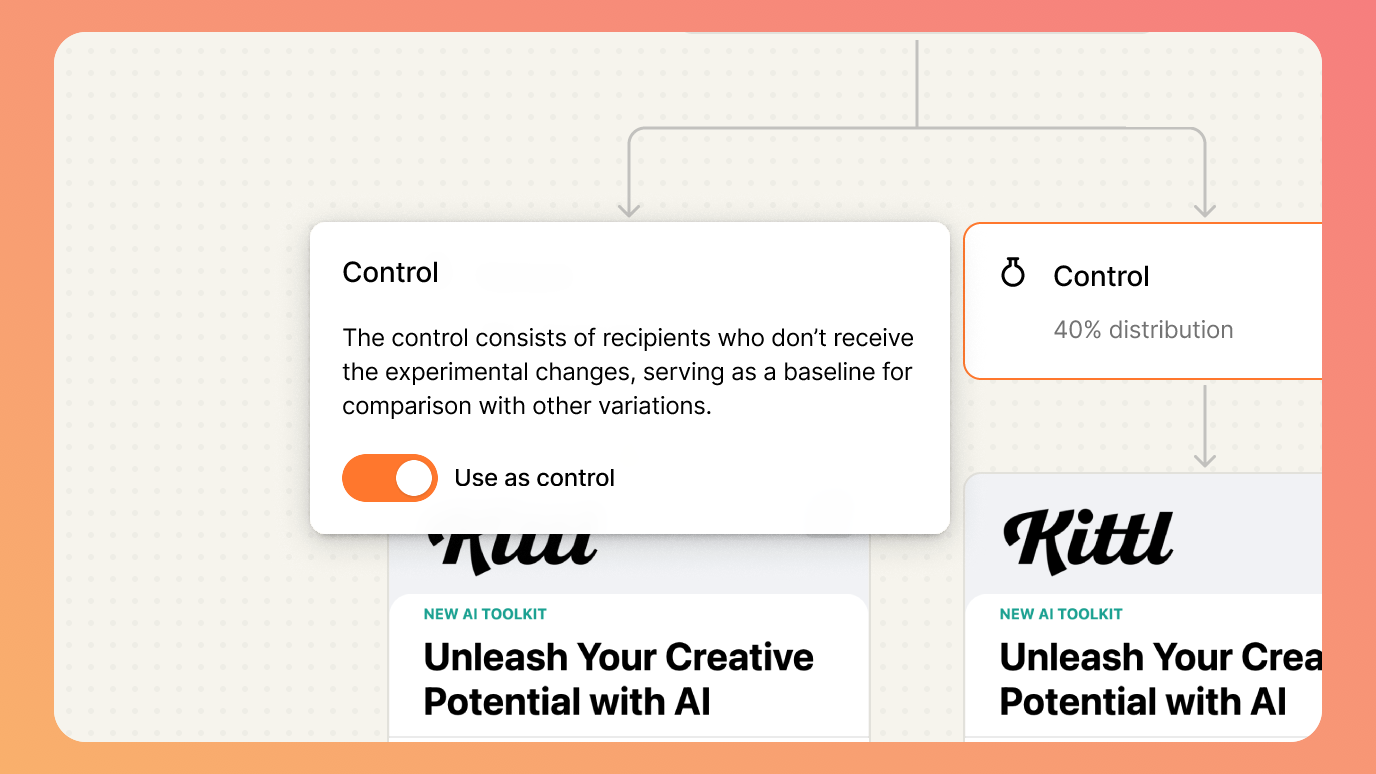
- Variant branches - Contain the emails you’re testing. These are sent to the percentage of contacts you specify. Your variants automatically split the test audience equally. For example, with a 60% test size and three variants plus a control:
- Each variant receives 20% of contacts (60% ÷ 3)
- The control receives the remaining 40%
- Control branch - Contains your baseline emails sent to all contacts not in the test group. Controls are optional:
- We recommend always having a control branch for accurate comparison
- Without a control, only your selected variant sample size will enter the experiment
- Example: With three variants at 75% sample size and no control, the remaining 25% of contacts will exit the automation without receiving emails
3
Create Your Test Variations
Now it’s time to make the changes to each of your emails that will be tested. You’ll need to apply these changes to each email one-by-one:
- Click on the email node for each variant
- Enter the editor for each email
- Describe the changes you want to make in the chat or make manual changes
- Subject Line Testing
- Content Testing
- Design Testing
“Change the subject line to focus on benefits instead of features”
“Make the subject line more urgent and action-oriented”
“Create a subject line that uses personalization with the contact’s name”
4
Launch Your Experiment
To run your experiment, set your automation to
Live in the top right corner. Before doing so, make sure:- At least one variant or control branch connected to your experiment node
- At least one email in each branch
5
Crown Your Winner
Once your experiment is running and contacts have flowed through the automation, visit the Metrics tab in the automation to analyze performance. Here you can compare variants and view key metrics for sends, opens, and clicks.After sufficient testing, you’ll want to send all future contacts through your best-performing variant. Here’s how to do so while preserving your test data:
- Convert your winner to the control: Click on your best-performing variant and toggle Use as control
- Route all traffic to the winner: Set the Experiment node sample size to 0%. This automatically changes the Control size to 100%, sending all future contacts through your winning variant
Editing Live Experiments
To adjust your experiment while it’s live, first pause the automation using the button in the top-right corner of the automation builder. While paused, you can:- Adjust the sample size percentage
- Edit variant and control branches
- Update email content
- Add or remove variants
Best Practices
Test One Variable at a Time
Test One Variable at a Time
Focus on testing one specific element per test to get clear, actionable results.Good tests:
- Subject line only
- CTA button text only
- Email length only
- Subject line + content + design all at once
- Multiple unrelated changes in one test
Test Elements That Matter
Test Elements That Matter
Focus your testing efforts on elements that can significantly impact performance.High-impact elements:
- Subject lines (biggest impact on open rates)
- First paragraph content (affects engagement)
- CTA buttons (drives conversions)
- Send timing (impacts overall engagement)
Let Tests Run Long Enough
Let Tests Run Long Enough
Allow sufficient time for statistical significance and to account for different user behaviors.Minimum test duration:
- 7 days minimum for most tests
- 14+ days for complex or low-volume automations
- Wait for statistical significance before making decisions
Document and Apply Learnings
Document and Apply Learnings
Keep track of what works and apply successful patterns across your email program.Documentation should include:
- What was tested and why
- Key results and insights
- How learnings will be applied
Need Help?
Our team is ready to support you at every step of your journey with Brew. Choose the option that works best for you:- Self-Service Tools
- Talk to Our Team
Search Documentation
Type in the “Ask any question” search bar at the top left to instantly find relevant documentation pages.
ChatGPT/Claude Integration
Click “Open in ChatGPT” at the top right of any page to analyze documentation with ChatGPT or Claude for deeper insights.