

Overview
The API tab in the Brew dashboard is a live catalog of the capabilities you can call from your own product. Open it at brew.new/api. Each entry runs against your real brand with a real API key, so what you see in the catalog is exactly what your code will get back. Once a call does what you want, copy it out in the shape you need: a raw request, a snippet in your language, or a prompt you paste into an AI agent. Use it to:- Try a capability before writing any code, with your brand’s own designs and contacts.
- Get a working request with your parameters already filled in.
- Hand an agent (Claude, Cursor, whatever you use) a briefed prompt with the endpoint, auth pattern, request fields, and docs link.
What’s in the Catalog
The catalog covers the eleven capabilities that make sense to run interactively: generation, media, and pre-send checks. It is not the whole API. Sending, automations, triggers, analytics, and contact and audience management are all on the v1 surface but not in the catalog, since a one-click run of a live send is not something you want in a browser tab. For those, see the API Introduction. Eleven APIs across three groups. The cost shown on each row is the same metering the API applies: usage-based ops charge actual model usage, fixed ops charge a flat published cost, and free ops charge nothing. See Credits for how metering works.Create
Generate and edit on-brand email designs.Media
Production-ready email imagery: render, animate, compress, resize.Quality
Pre-send checks for content, recipients, rendering, and placement.The costs above are what the catalog displays today. The authoritative
number for any given call is the
X-Credit-Cost response header, and
the full machine-readable table is at GET /v1/help →
credits.operations.Running an API
Click any row to open its detail view. The layout is the same for every API: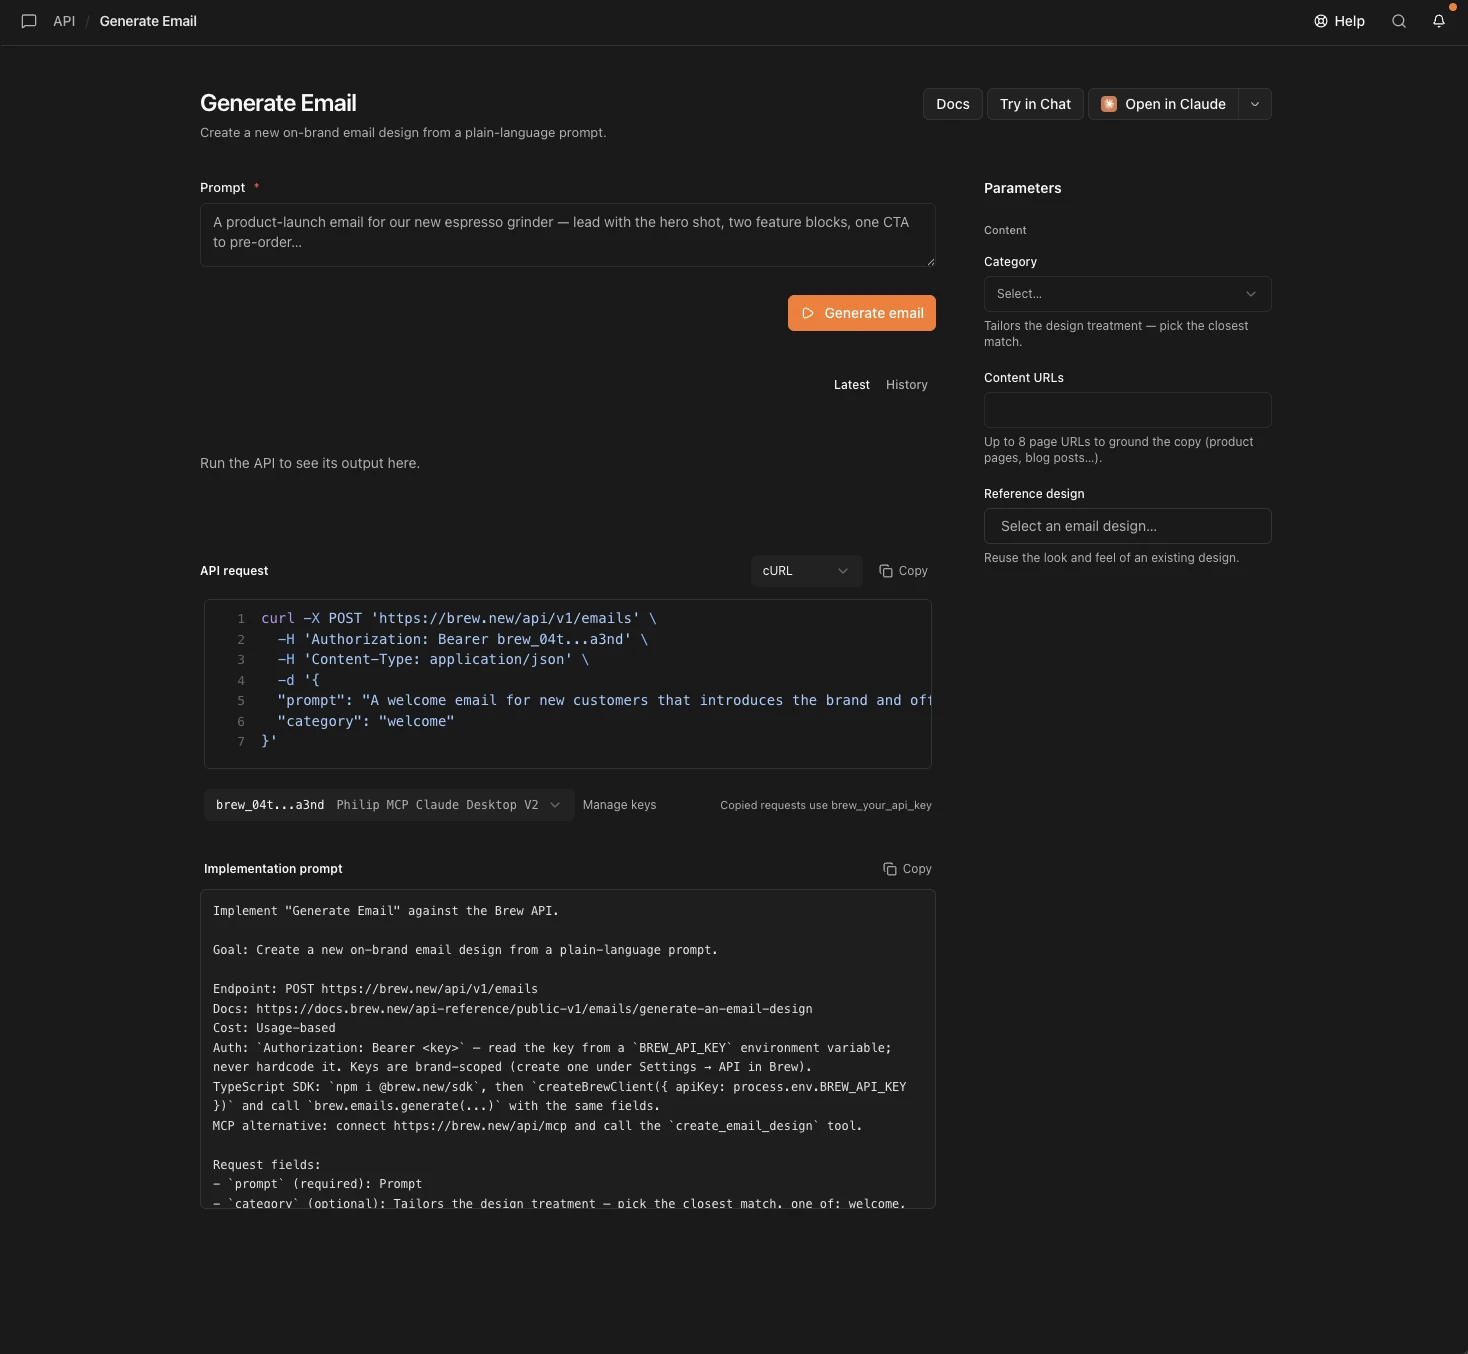
1
Fill in the required input
The main input sits at the top, marked with a red asterisk. On
Generate Email that’s the prompt: “A product-launch email for our
new espresso grinder, lead with the hero shot, two feature blocks, one
CTA to pre-order.”
2
Adjust the optional parameters
The Parameters rail on the right holds everything optional. Each
field maps one-to-one to a field in the request body, and editing one
rewrites the request snippet below in real time.
3
Run it
Hit the run button. The result appears under the input, and the
Latest / History tabs let you flip between this run and
previous ones.
4
Copy the call out
Take the API request snippet in your language of choice, or the
Implementation prompt if you want an agent to write the
integration.
Parameters
The Parameters rail is per-API. On Generate Email it holds three:
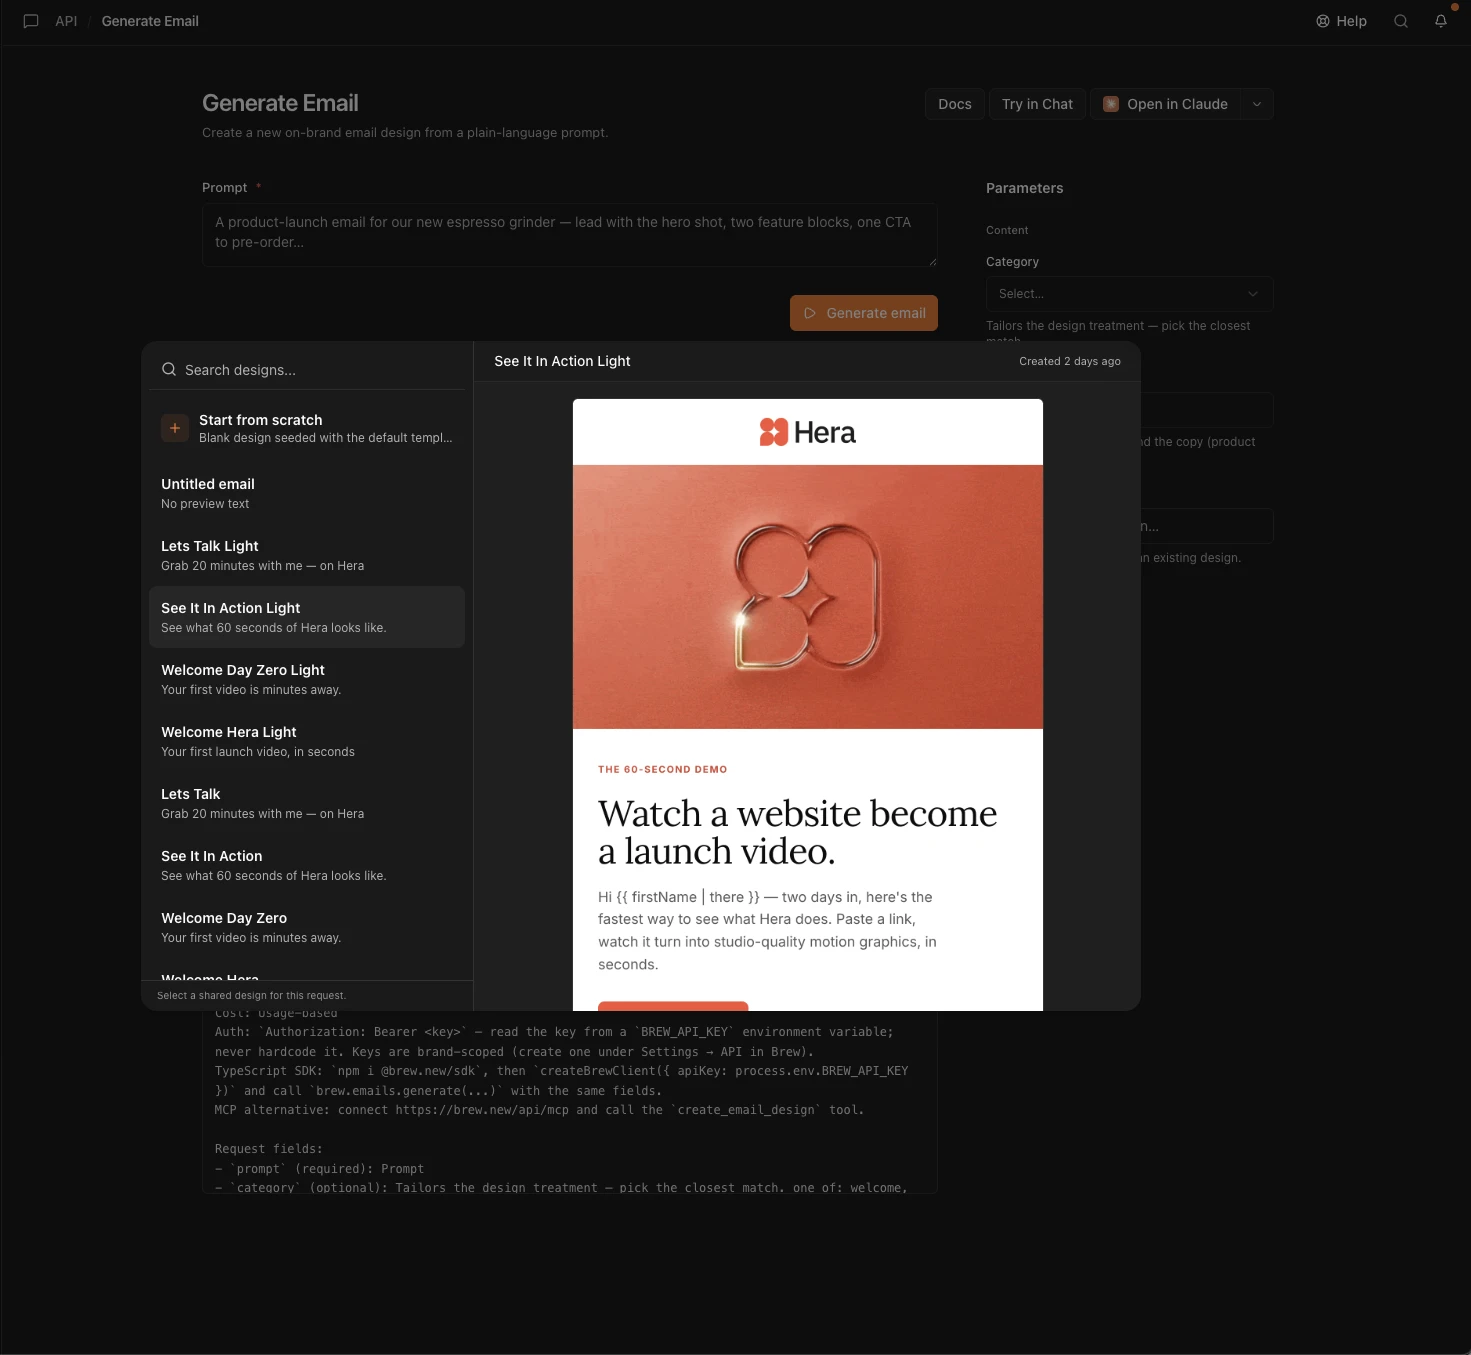
Reference design opens a picker of every email in your account, with
search and a full preview of the highlighted design, plus a Start from
scratch option that seeds a blank design from the default template.
It’s the same reference-email mechanic as
the editor, so you can point at a design you
already like instead of describing it.
The API Request Snippet
The snippet updates as you change parameters, and the language dropdown switches it between four shapes:
Below the snippet is the key picker. It selects which of your brand’s API
keys the in-app run authenticates with, and Manage keys jumps to
brew.new/settings/api. The key you pick
applies to the run only: copied snippets always carry the
brew_your_api_key placeholder, so nothing you paste into a doc, a
ticket, or a chat window leaks a live credential.
The Implementation Prompt
Under the request snippet, every API carries a copyable Implementation prompt: a briefing written for a coding agent. It contains the goal, the endpoint, the docs link, the cost, the auth pattern (read the key fromBREW_API_KEY, keys are brand-scoped), the TypeScript SDK
equivalent, the MCP tool that does the
same job, every request field with its type and constraints, an example
request body, and a closing instruction to ask you about SDK versus raw
HTTP before writing code.
Copy it into Claude Code, Cursor, or any agent with repo access and you
get a working integration without the agent guessing at the surface. The
header buttons cover the same ground in fewer clicks:
- Docs opens the endpoint reference for that API.
- Try in Chat hands the capability to the Brew chat agent.
- Open in Claude sends the implementation prompt straight to Claude, with a dropdown for the other agents you can target.
What to Read Next
API Introduction
How the whole surface fits together: auth, brand scoping, sends,
analytics, automations.
MCP Server
Let an agent call Brew directly, no integration code required.
Need Help?
Our team is ready to support you at every step of your journey with Brew. Choose the option that works best for you:- Self-Service Tools
- Talk to Our Team
Search Documentation
Type in the “Ask any question” search bar at the top left to instantly find relevant documentation pages.
Ask ChatGPT or Claude
Click here to open the Copy page menu at the top of this page, then send the page to ChatGPT, Claude, or your editor.